Testing Procedure
Below is the summary steps to do before we begin with the detail :
- Boot the TestQC LiveUSB
- Check the Device Info List (Component List)
- Connect to the network
- Do the Testing (Keyboard, Deadpixel, Harddisk … and so on)
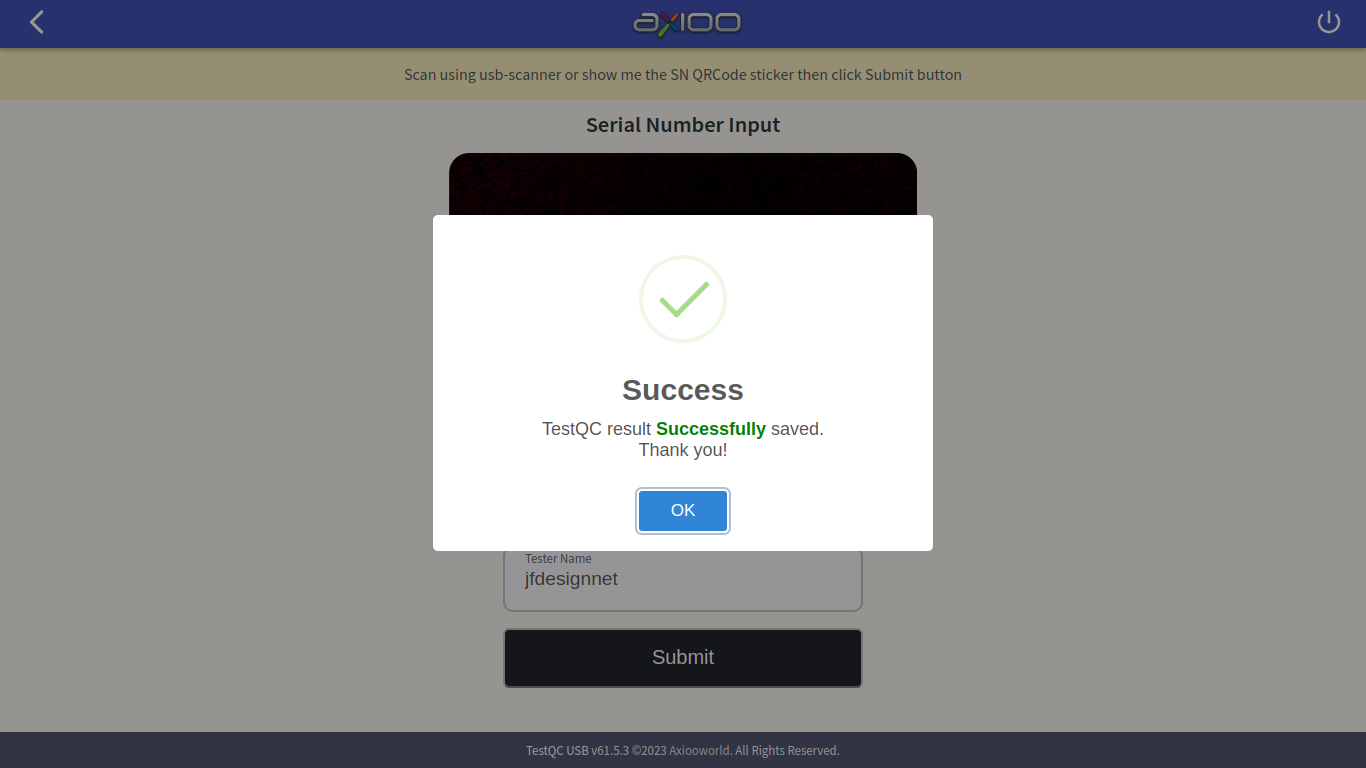
- Scan the barebone Serial Number (SN ID) or manually input the Serial number
- Submit the report test
- Shutting down
Boot from USB
In Legacy BIOS systems, it is easy to select a boot device by simply setting the boot priority in the BIOS setup menu or using the F12 Boot device menu. On a UEFI system, in order to boot from a USB Flashdisk, the Secure Boot system must be turned off first in the BIOS settings.
For mass testing on production line, before testing :
- Make sure the TestQC server is online and available
- Make sure the Ethernet or WiFI network is ready (SSID name and password)
- Quiet environment and enough room lighting (important for mic, speaker and webcam test)
- Line up device under test and barcode scanner for serial number scan
- Booting progress :

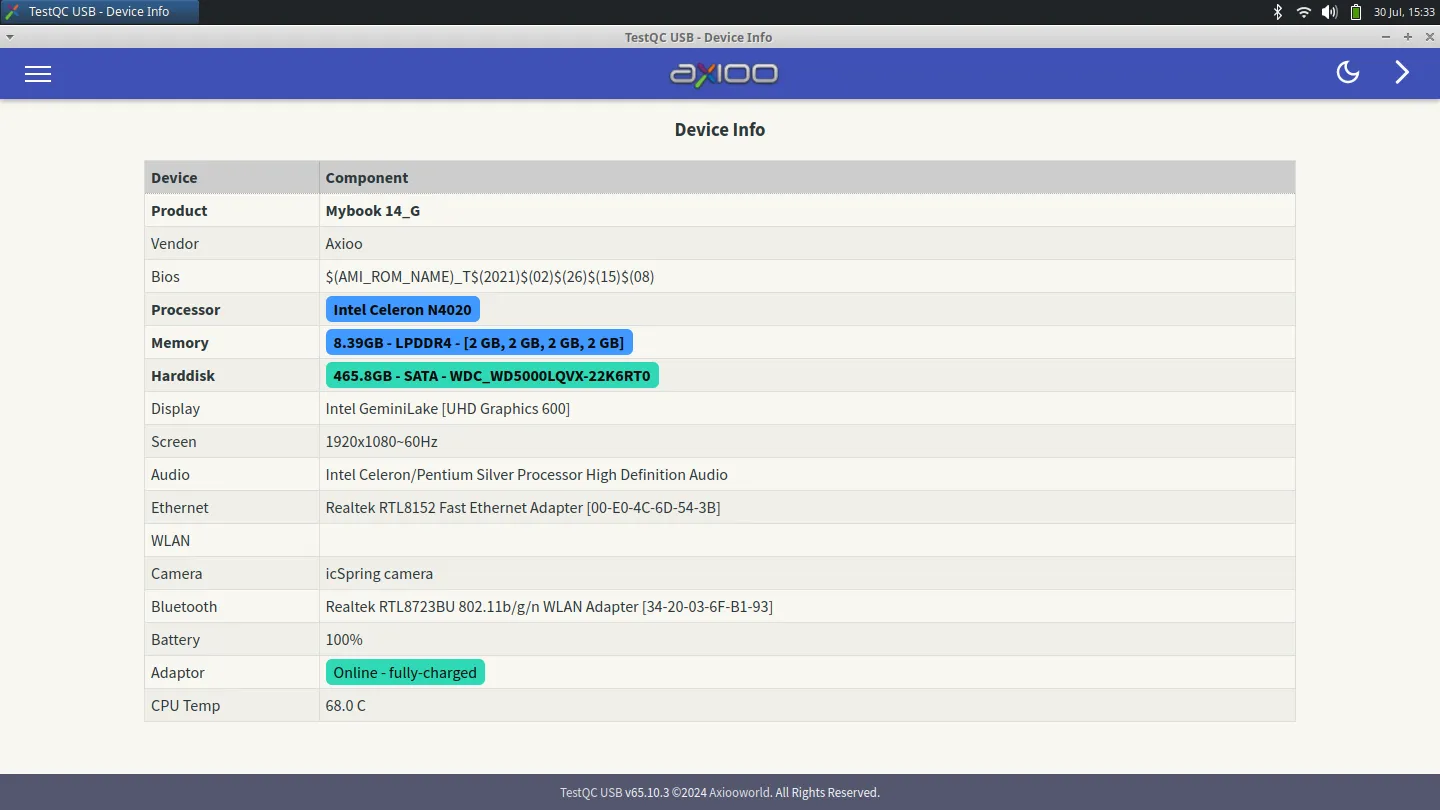
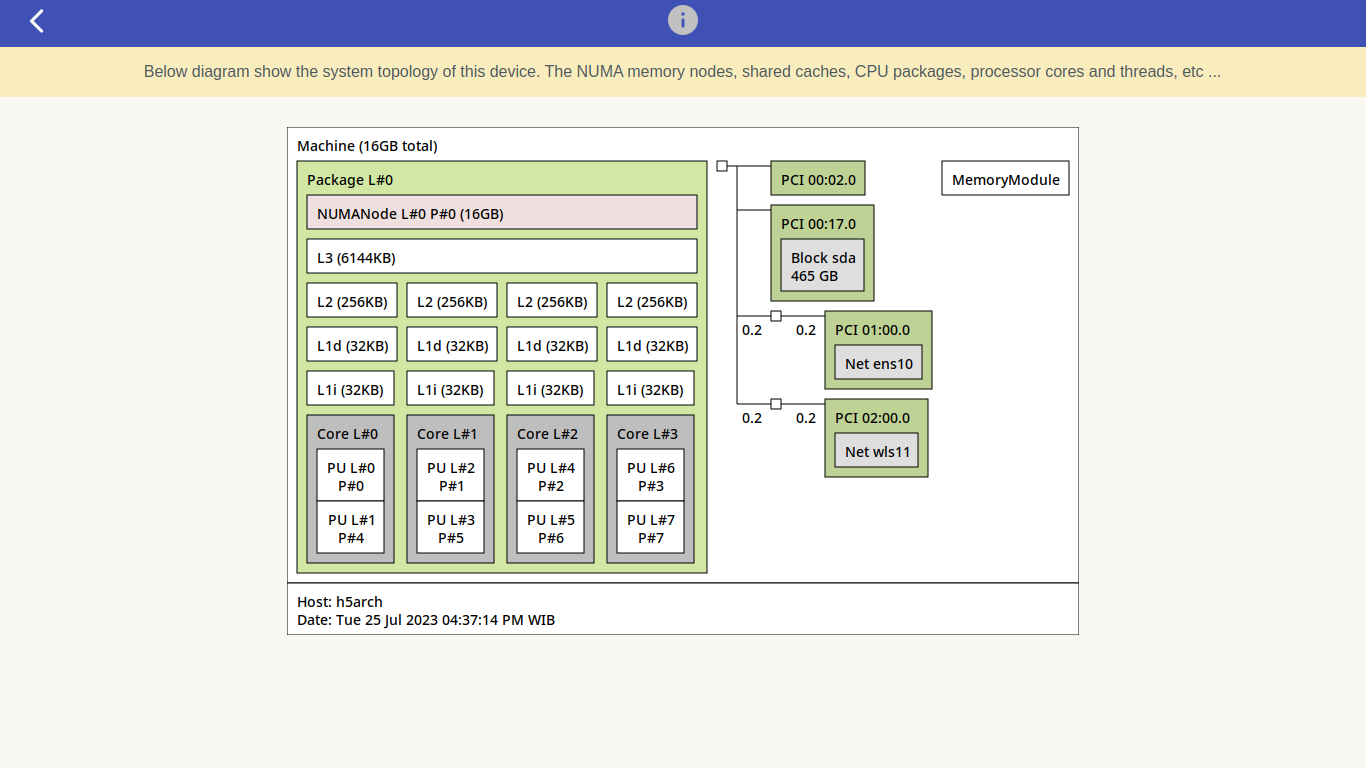
- Device Info :
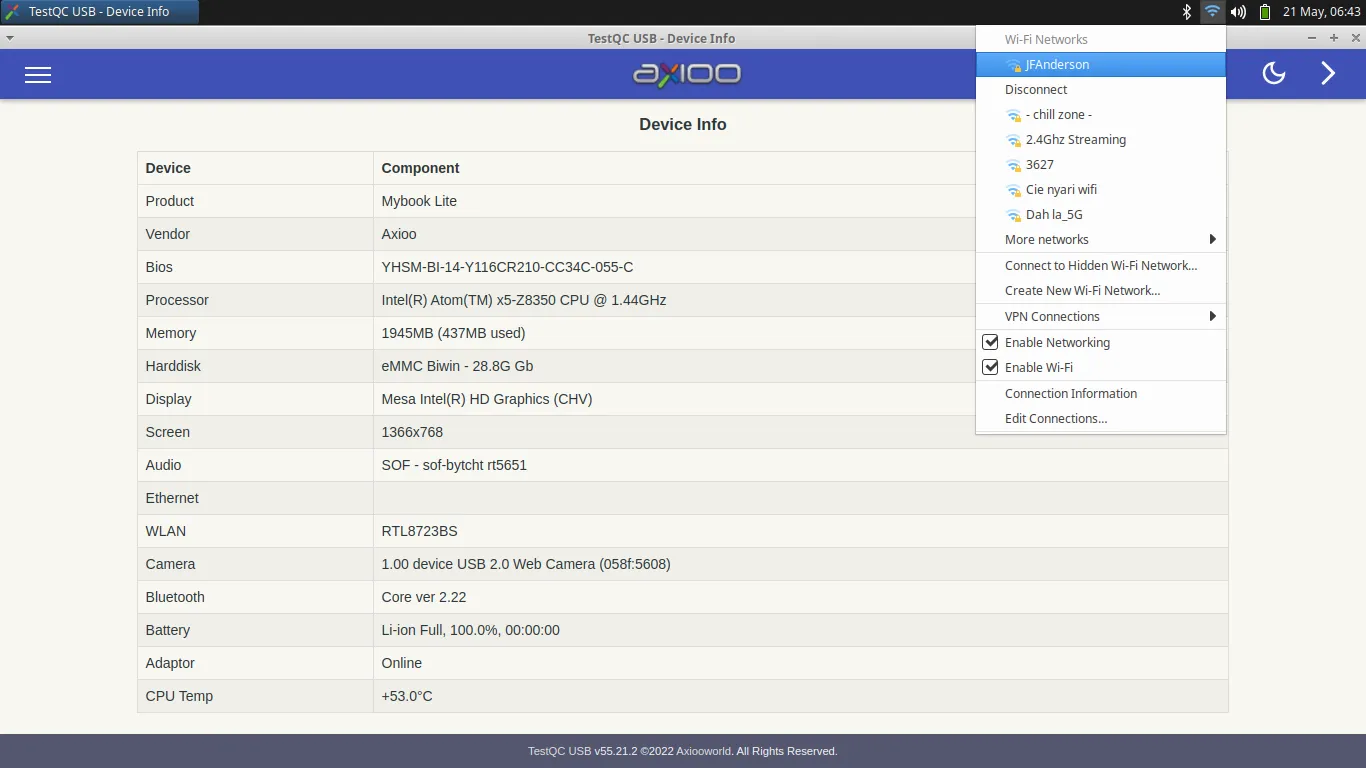
- Connecting to network :
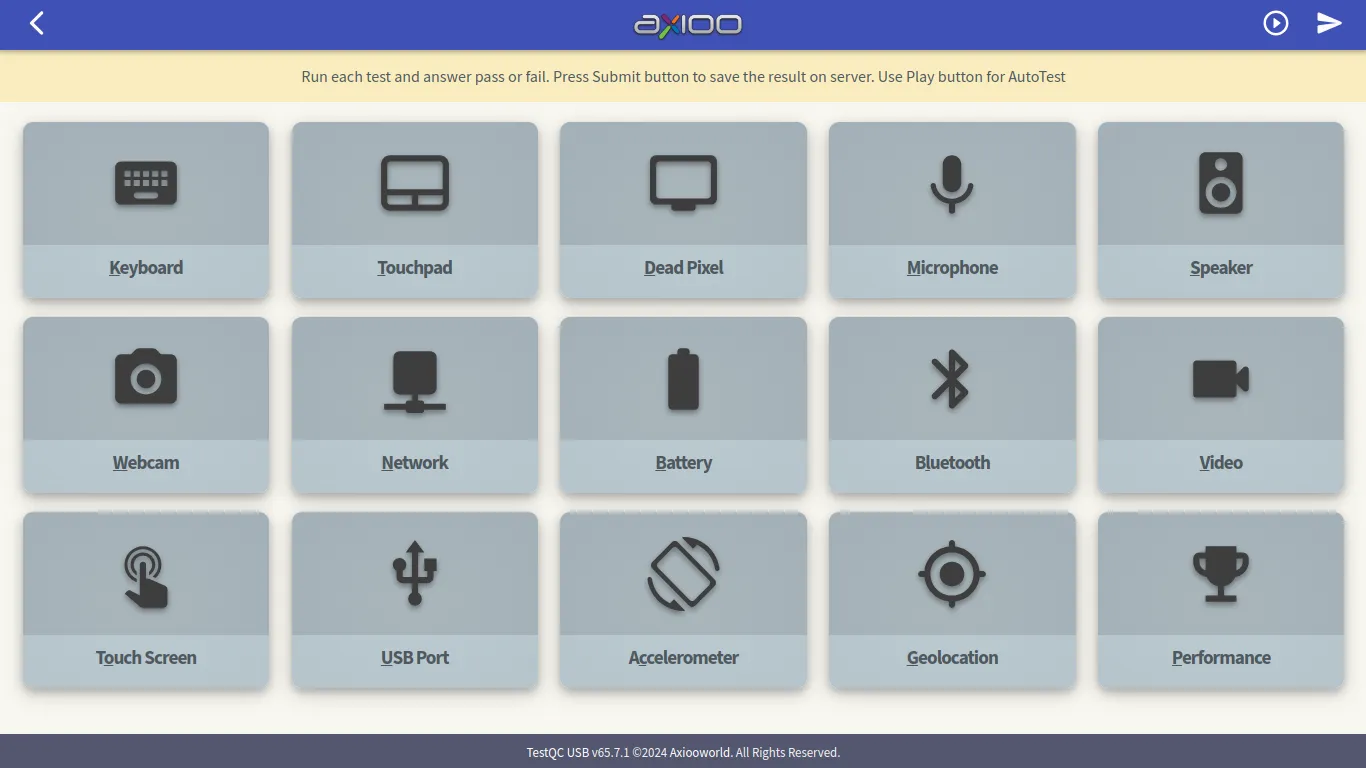
- Testing Menu :
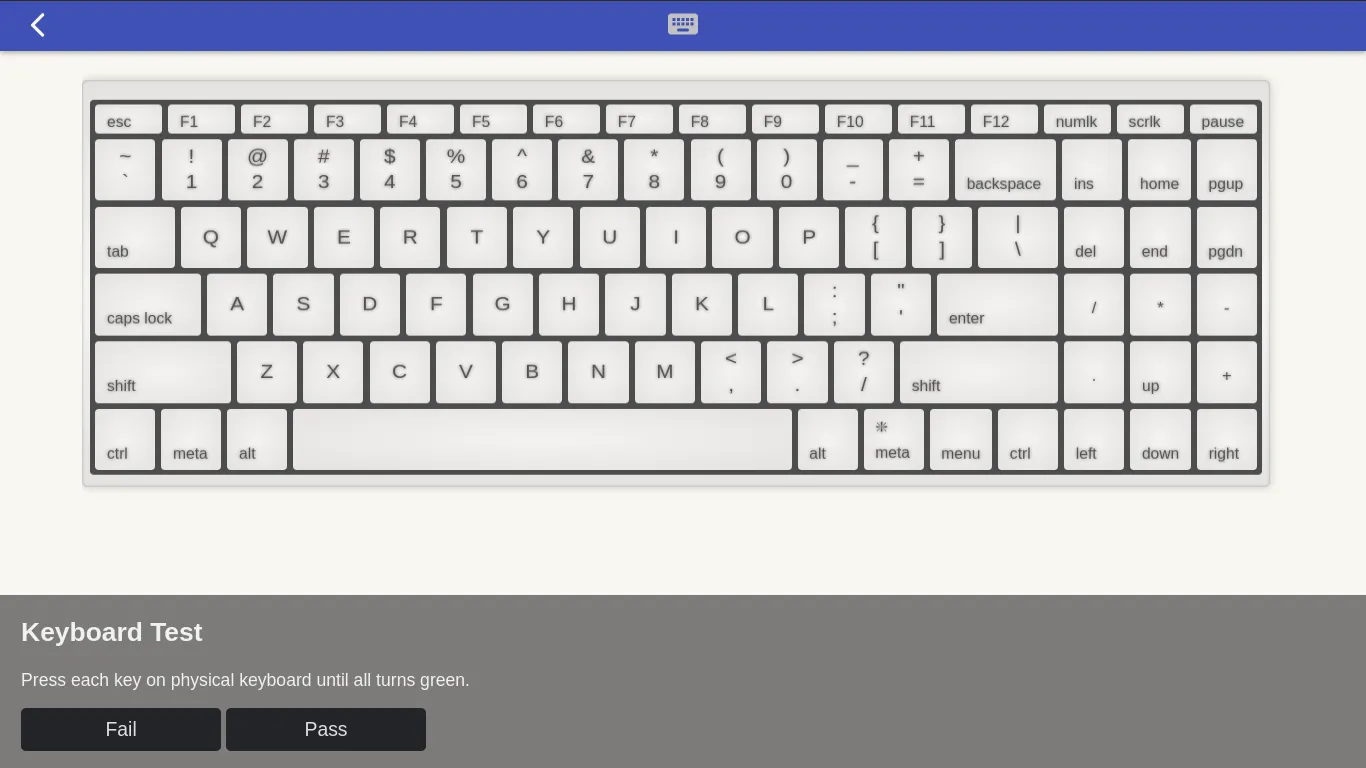
- Keyboard test :
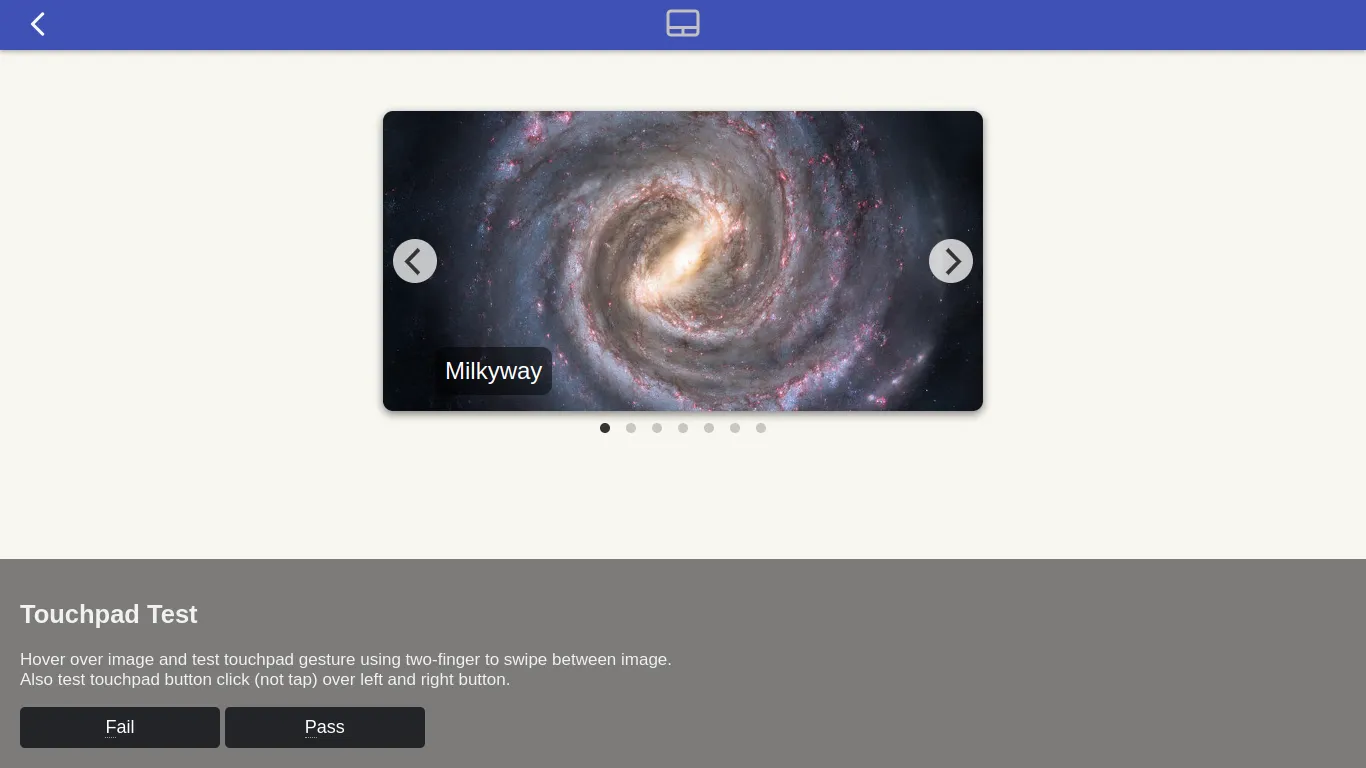
- Touchpad test :
- Dead Pixel test :
![]()
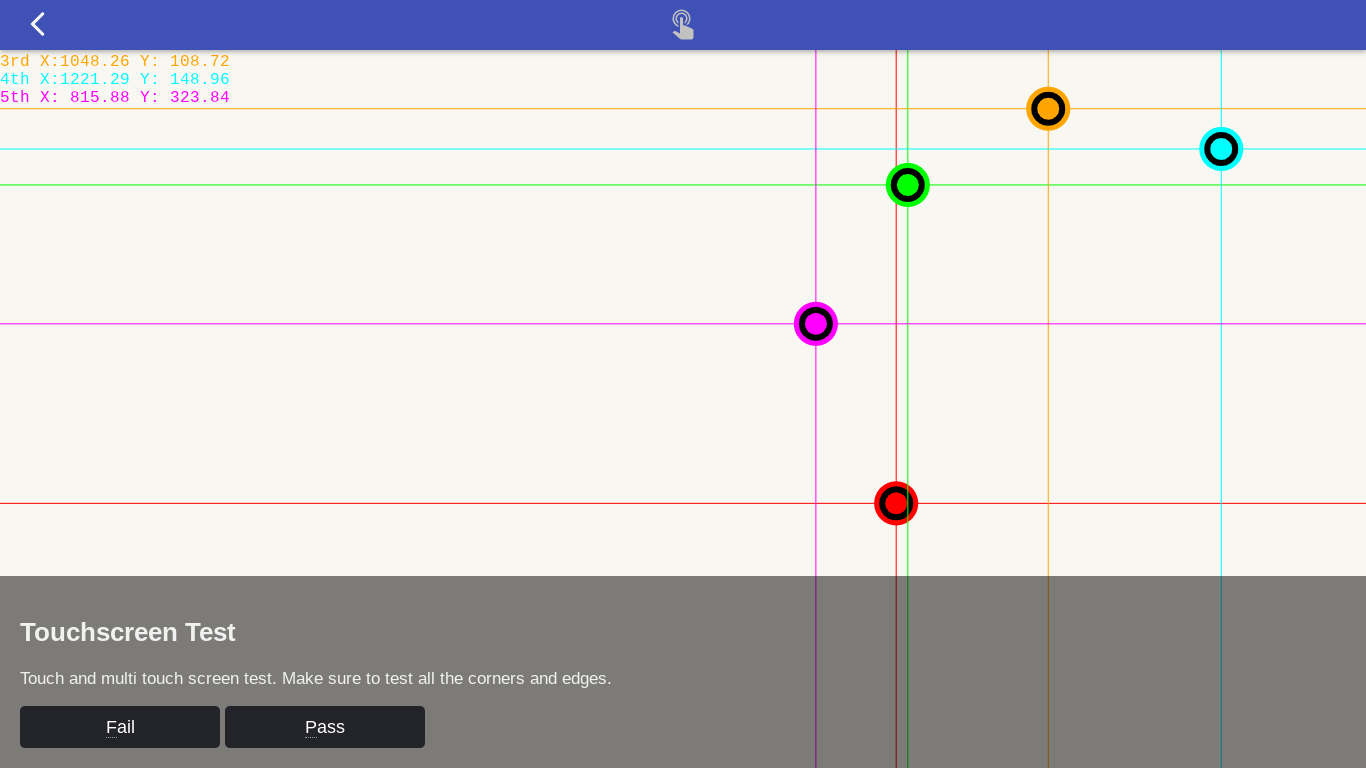
- Touchscreen test :
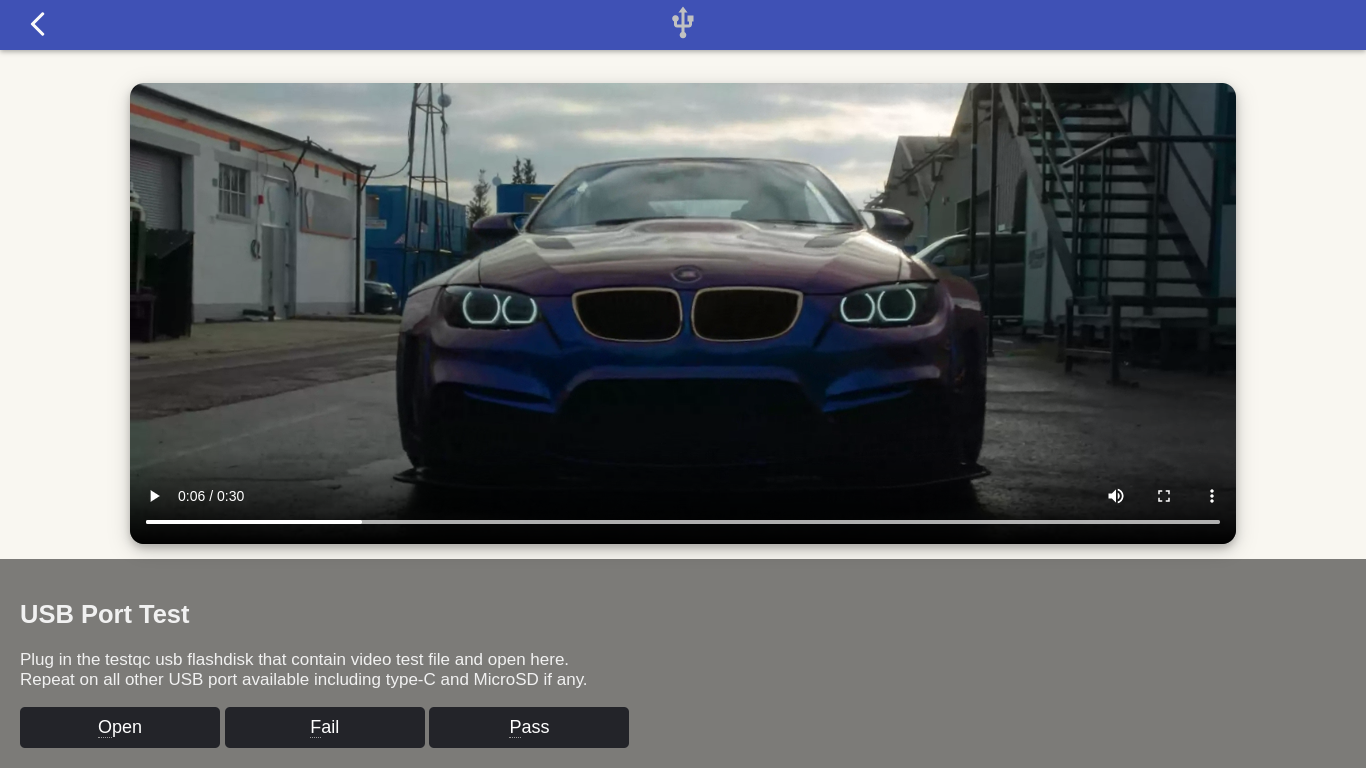
- USB Port test :
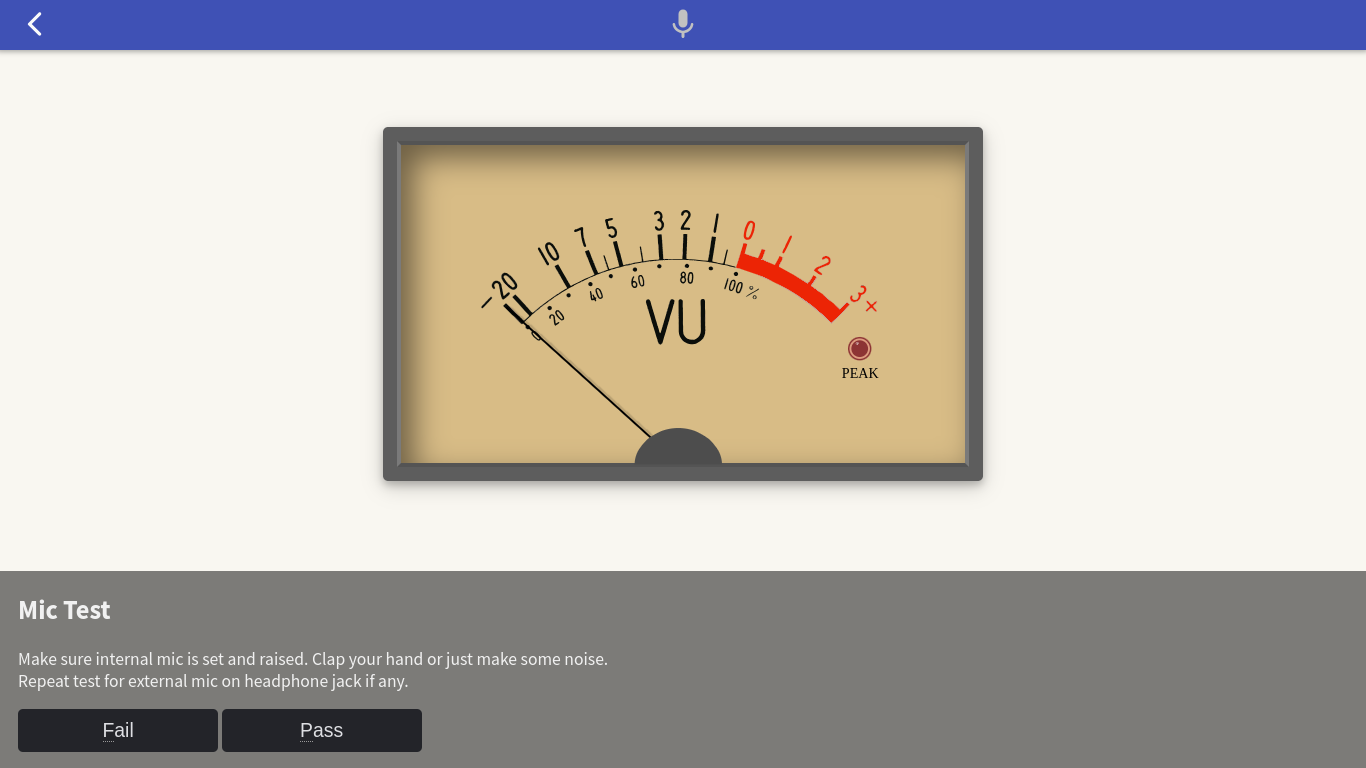
- Microphone test :
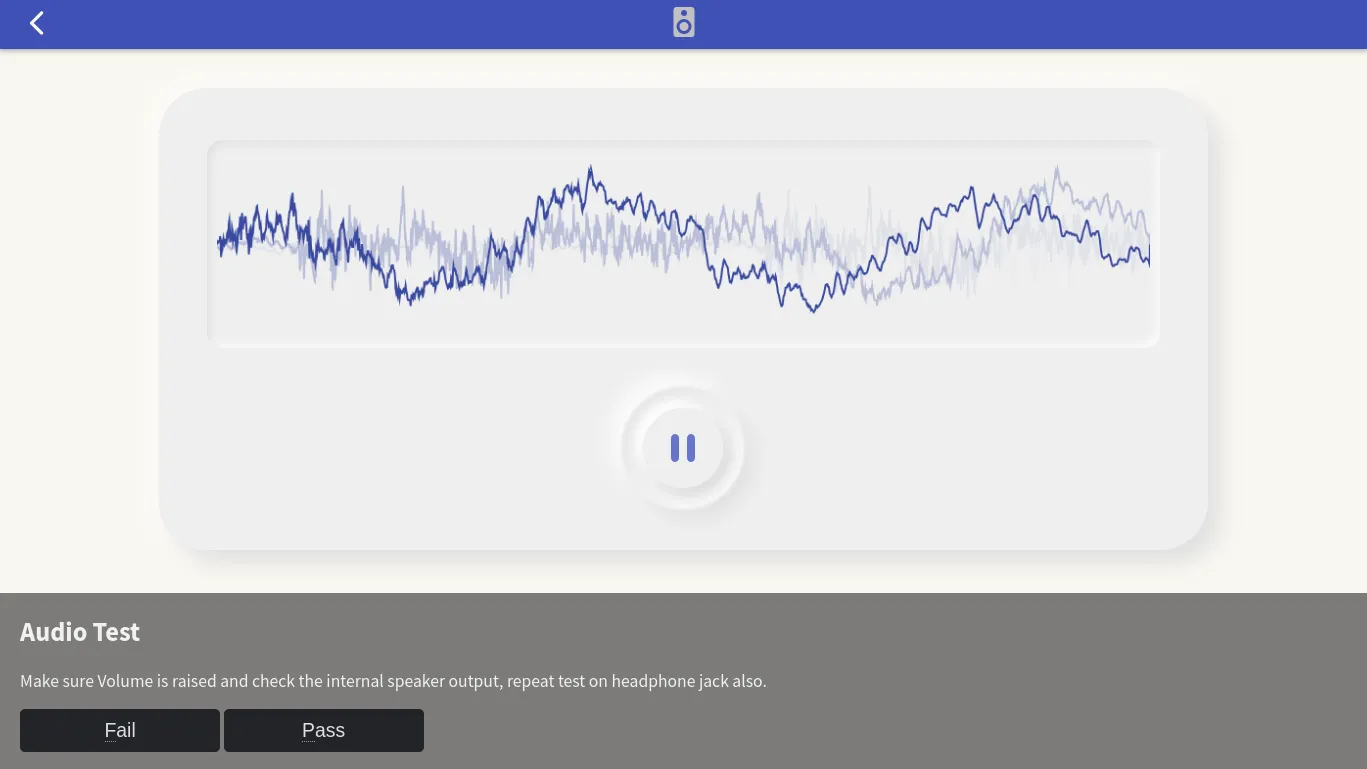
- Speaker test :
- Video test :

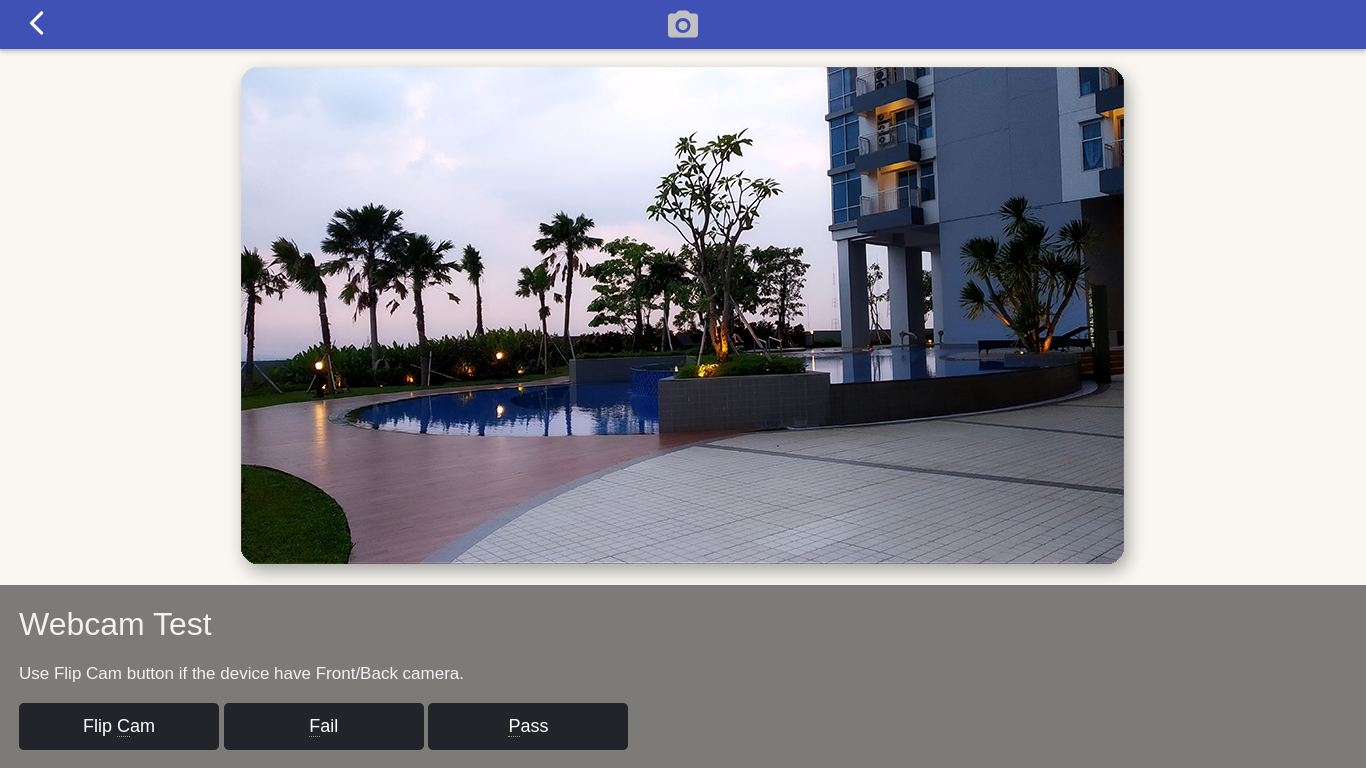
- Webcam test :
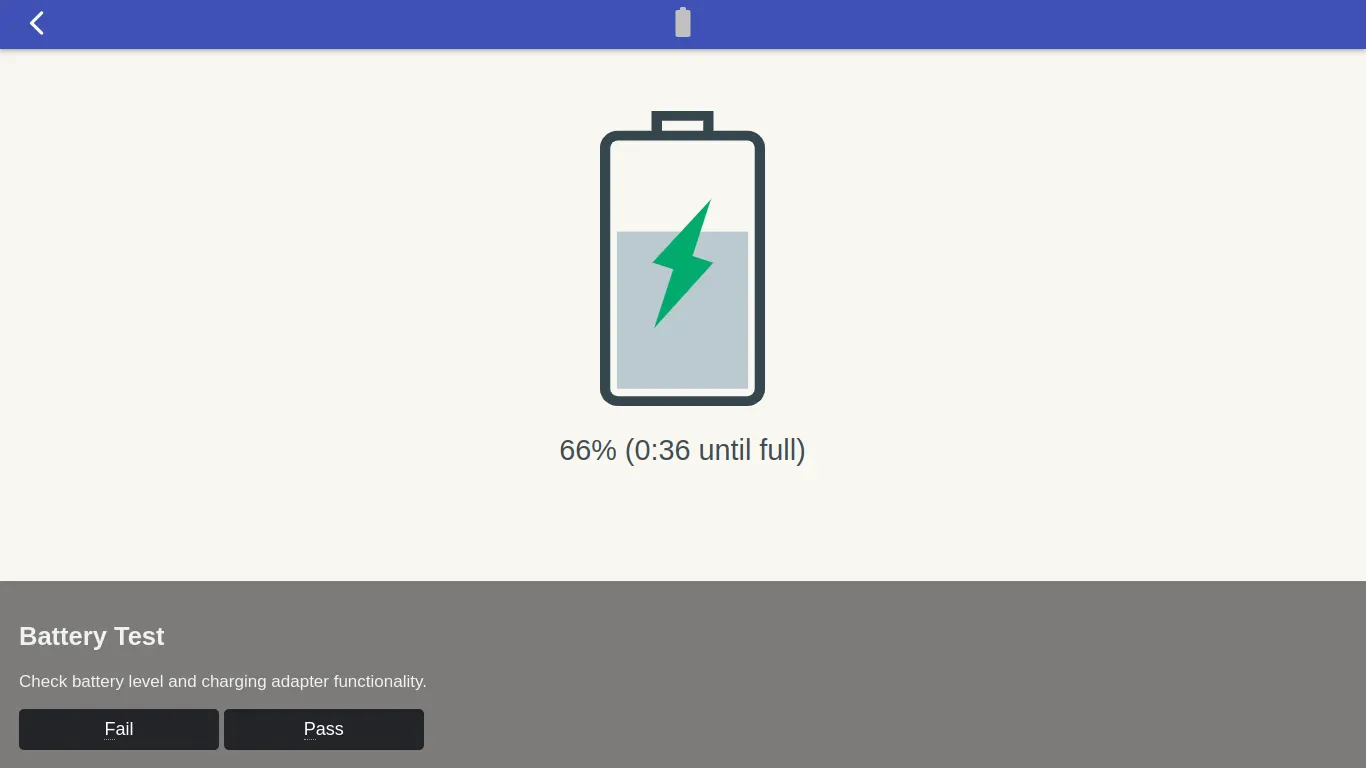
- Battery test :
- Bluetooth test :

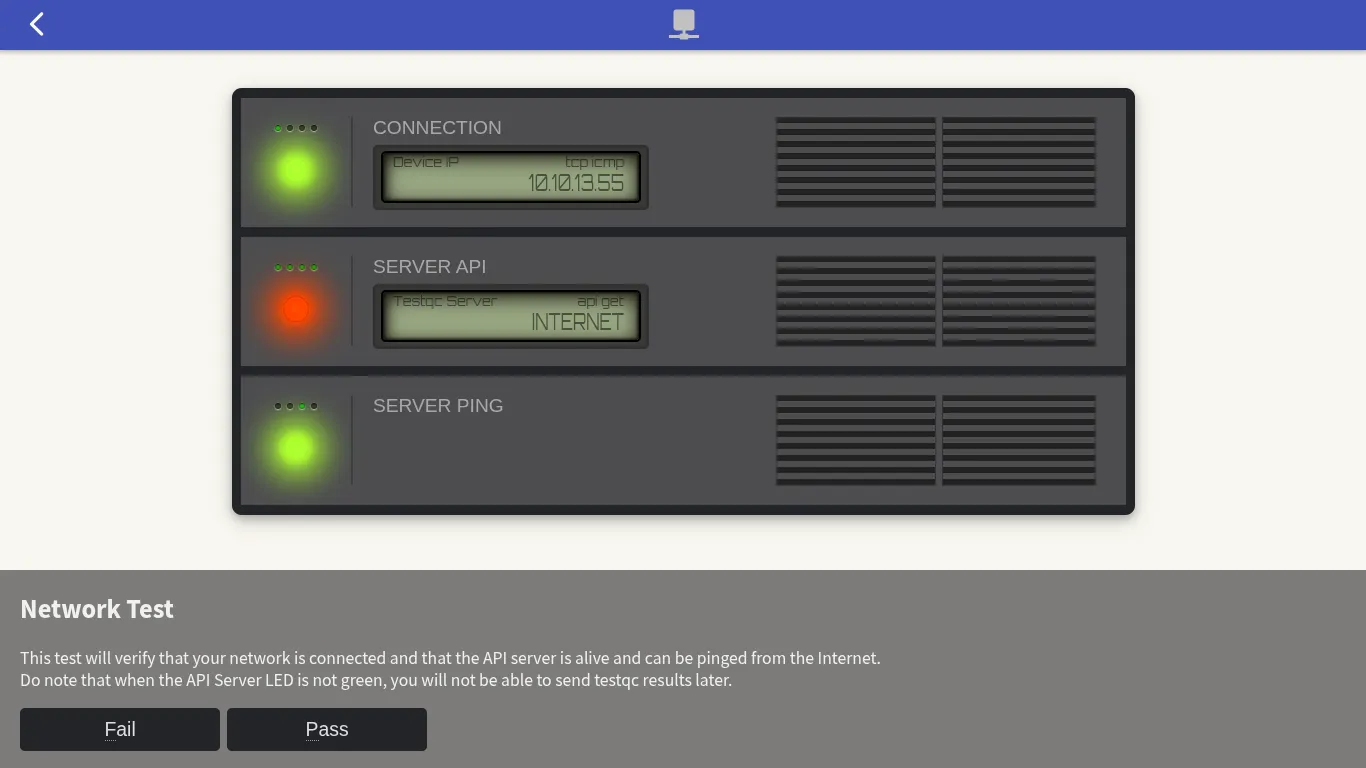
- Network test :
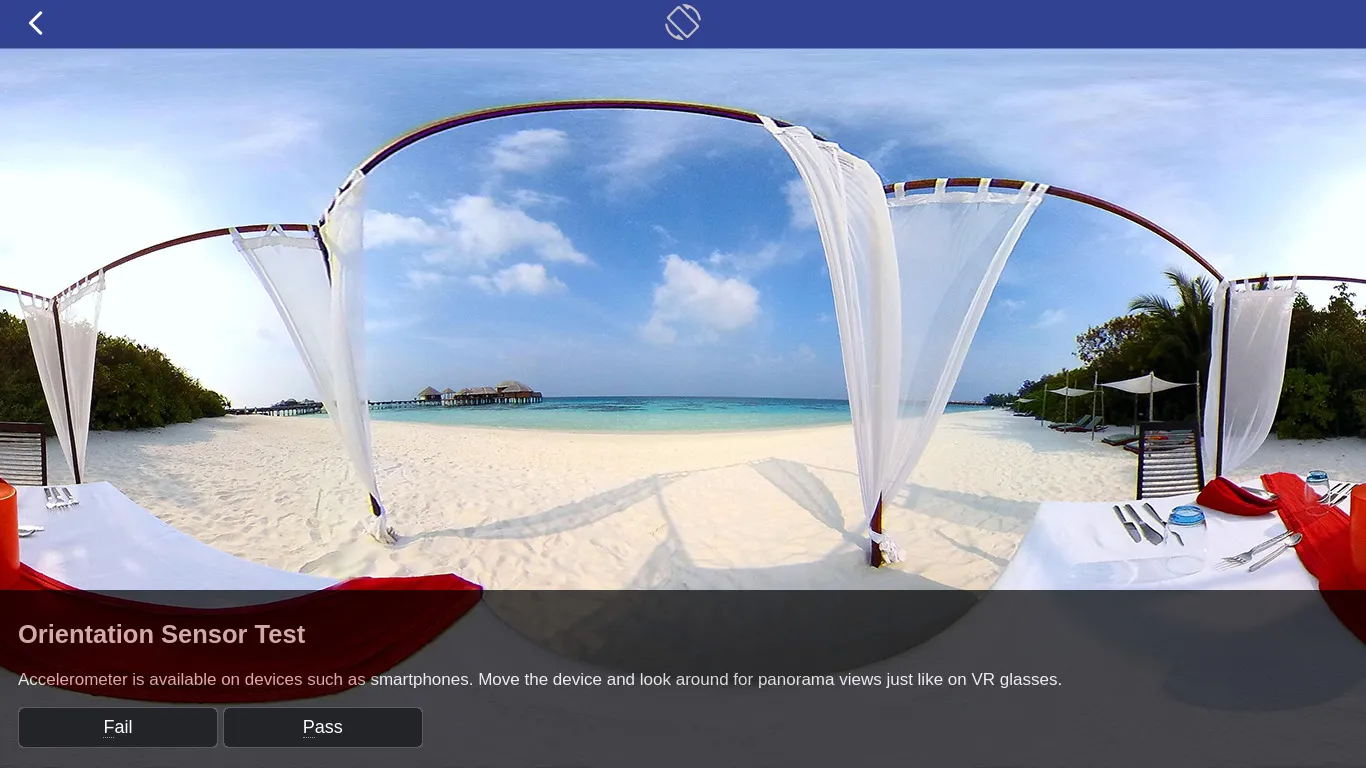
- Accelerometer / Orientation test :
- Geolocation test :

- System Information :
- Posting Report :

- Finish :
Shutdown the device and move on to the next device.